
Permanent Holiday Lighting using WLED and Custom J-Channel Mounts
Installing addressable WS2812B LEDs permanently under the eaves of the house with custom J-channel tracks and QuinLED Dig-Quads.
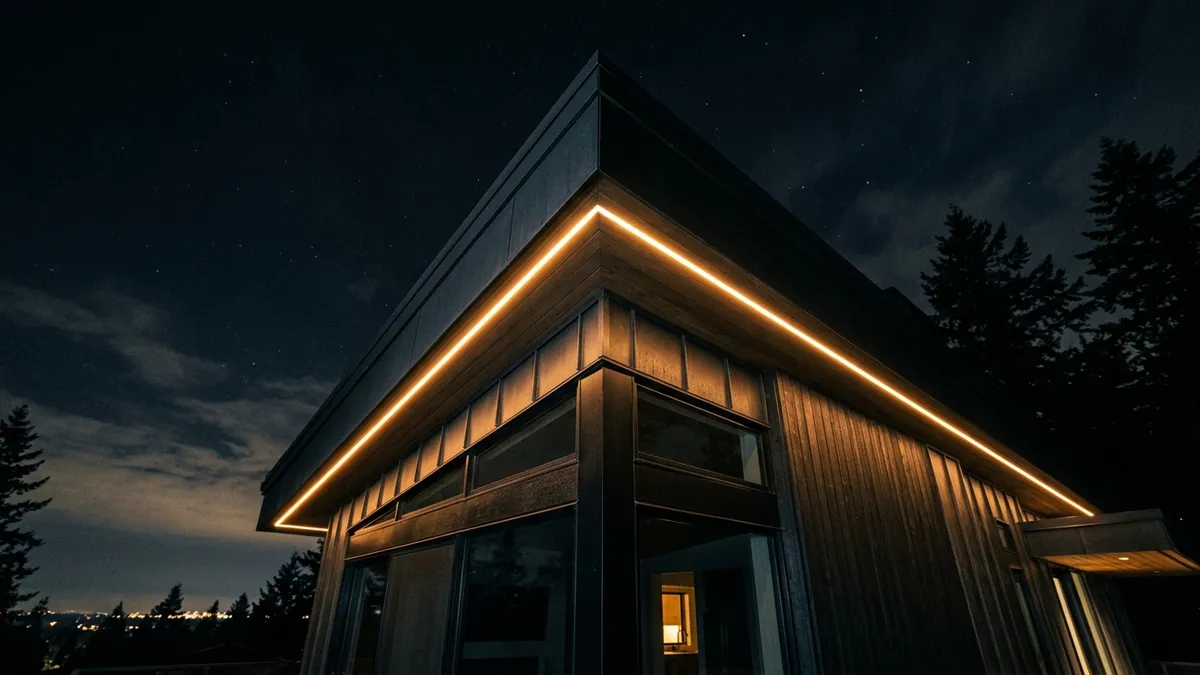
Addressable LEDs combined with the WLED software offer the ultimate, subscription-free way to customize holiday lighting. No more putting up Christmas lights in the freezing cold. I decided to install permanent addressable holiday lighting on the exterior of my house.
Here is how I designed the physical mounts using J-channels, wired the exterior WLED controllers, and integrated everything into Home Assistant.
1. The Hardware & Track System
For the permanent architectural lighting on the house, reliability and power distribution are critical. To keep the lights hidden during the day but bright at night, I used vinyl J-channels (typically used for siding).
Parts List & Tools
To build this, you need a few basic components:
| Part | Description | Purchase Link |
|---|---|---|
| QuinLED Dig-Quad | High-performance addressable LED controller | QuinLED |
| WS2812B LED Strips | 5V IP67 waterproof addressable LEDs | Amazon |
| 5V 40A Power Supply | High-current power brick for long runs | Amazon |
| Custom J-Channel Mounts | 3D-printed brackets to secure strips | Printables |
| 14 AWG Wire | Thick copper wire for power injection | Amazon |
The Installation Process
- 3D-Printed Mounting Brackets: Using my 3D printer, I printed custom spacing clips to secure the led strips firmly inside the J-channel facing downwards. This keeps the spacing uniform and prevents the adhesive backing from peeling off due to summer heat.
- Mounting the J-Channel: I mounted the J-channels directly under the fascia boards on both the first and second stories of the house. The J-channel hides the LEDs from direct view, creating a premium wash effect down the exterior walls.
- Power Injection: Because LED strips suffer from voltage drop over long runs, I injected 5V power at the beginning, middle, and end of the strip runs using 14 AWG wire. This prevents the ends of the strips from fading into yellow/red tones.
2. WLED Segmentation & Control
In WLED on the Dig-Quad, I mapped the house into two distinct segments:
- First Floor
- Upper Floor
By segmenting the house, Home Assistant can trigger distinct animations—for instance, keeping the first floor a solid warm white for security, while running a “Candy Cane” effect on the upper floor.
Home Assistant Integration
The Dig-Quad pulls directly into Home Assistant via the native WLED integration. This allows me to sync the lights with sunset schedules, trigger custom lighting presets (orange/purple for Halloween, red/green for Christmas), and instantly kill power to the power supply via a smart plug when the house goes to sleep.
Conclusion
By prioritizing a local-first approach with this hardware, you ensure maximum reliability and data privacy for your homelab. Check out the GitHub repository for the full configuration files!